Author Archive: admin

How to Manage User Registrations on WordPress

How to Manage User Registrations on WordPress

To successfully manage user registrations in WordPress, it’s essential to understand the setup and options available. By default, WordPress allows administrators to enable user registrations, which is beneficial for sites needing user contributions, such as forums or membership sites. To enable this feature, go to the dashboard, then navigate to Settings > General, and check the “Anyone can register” option under Membership.

Assigning the right roles to new users is crucial; options range from Subscriber to Administrator. Typically, the Subscriber role is the safest, as it provides the least access necessary.

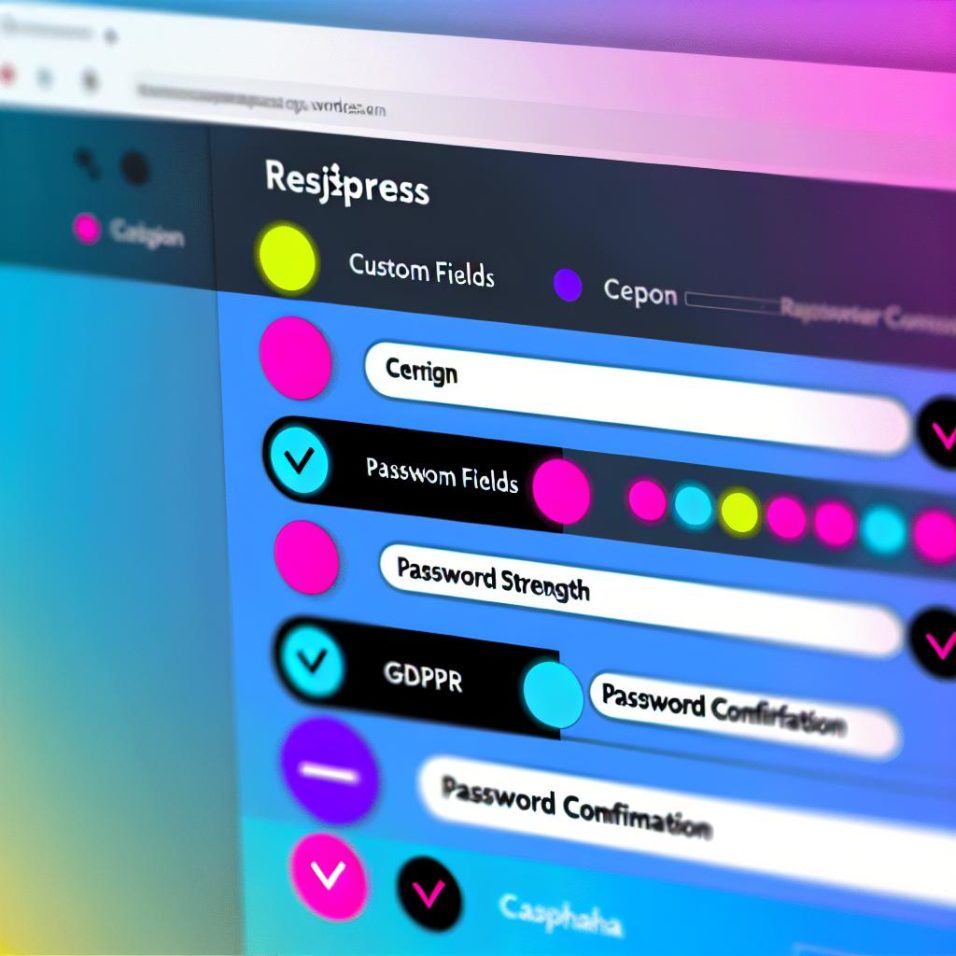
To enhance registration management, WordPress plugins like UsersWP and Ultimate Member are recommended. These plugins allow for custom registration forms and comprehensive user profile customization. Enhancing security during registration is vital, achievable through CAPTCHA integration and email verification to deter spam.

Managing registered users involves navigating to Users > All Users on the dashboard, where you can manage roles and monitor activities. For custom role management, plugins like the User Role Editor can be used. Monitoring user activities, especially on sites with many members, can be effectively done using plugins such as Simple History, which logs user actions and changes.

In conclusion, effectively managing WordPress user registrations involves combining default features with plugins to enhance functionality, security, and user experience while optimizing the registration process.

How to Set Up a Custom RSS Feed in WordPress

How to Set Up a Custom RSS Feed in WordPress

**Excerpt: Understanding the Basics of RSS Feeds**

RSS (Really Simple Syndication) is a convenient method for distributing website content automatically to subscribers. While WordPress provides a default RSS feed, creating a custom one can offer greater control over syndicated content.

**Step-by-Step Guide to Creating a Custom RSS Feed:**

1. **Create an RSS Template:**
– Connect to your website via FTP or use your hosting account’s File Manager.
– Go to the theme folder at `/wp-content/themes/your-theme-name/`.
– Create a new template file, such as `custom-rss-template.php`, to manage your feed display.

2. **Add Code for the RSS Feed:**
– Open the `custom-rss-template.php` file and include basic WordPress RSS feed structure code. This sets the XML format and queries recent posts to display in the feed.

3. **Register the Custom Feed:**
– Modify your theme’s `functions.php` to register the new feed with WordPress.
– This involves adding specific functions to create a new feed endpoint at `/feed/customfeed/`.

4. **Testing the Custom RSS Feed:**
– Visit `http://yourwebsite.com/feed/customfeed/` to verify proper XML display and information accuracy.

**Conclusion:**
Crafting a custom RSS feed empowers WordPress site owners to tailor their content distribution, enhancing subscriber engagement. For more on WordPress customization, refer to the [WordPress Template Hierarchy Documentation](https://developer.wordpress.org/themes/basics/template-hierarchy/).

How to Add Social Sharing Buttons to WordPress Posts

How to Add Social Sharing Buttons to WordPress Posts

Adding social sharing buttons to your WordPress posts is an effective strategy to boost user interaction and broaden your content’s reach. These buttons make it easier for readers to share your content on social media, increasing visibility and potentially enhancing SEO.

To add these buttons, you can use WordPress plugins, which offer a simple setup process. Popular plugins like Social Warfare, Monarch, and Easy Social Share Buttons can be installed from the WordPress dashboard by searching for them under “Add New” in the Plugins section. Once installed, you can configure the buttons’ appearance and select which social networks to include.

Alternatively, if you prefer more control, you can manually add social sharing buttons by inserting HTML and JavaScript directly into your theme’s code. This approach requires basic coding skills and involves editing theme files to dynamically generate share links using each social platform’s API.

Whether opting for a plugin or manual code, incorporating social sharing buttons is beneficial for increasing content engagement and traffic. Visit the WordPress Plugin Repository for more plugin options and details.

How to Fix a WordPress Site Stuck in Maintenance Mode

How to Fix a WordPress Site Stuck in Maintenance Mode

### Understanding WordPress Maintenance Mode

WordPress enters maintenance mode during tasks like updates, displaying a notification to visitors that the site is temporarily unavailable. This mode is crucial for updates, but problems can occur if a site remains stuck, preventing access.

#### Identifying the Issue

A stuck maintenance mode often means the `maintenance.php` file is lingering in the site’s root directory. This file, created for updates, is generally removed automatically post-update. Interruptions, like timeouts or server errors, might leave the file intact, causing the issue.

#### Accessing Your Site Files

To fix this, access your site via an FTP client or your hosting provider’s file manager, navigating to the WordPress root directory, usually `public_html`.

#### Deleting the .maintenance File

Follow these steps to remove the maintenance mode lock:

1. Use an **FTP client** or **file manager** to connect to your server.
2. Go to your WordPress root directory.
3. Enable viewing of hidden files.
4. Locate and delete the `.maintenance` file.

### Checking for Incomplete Updates

After removing the file, verify that all updates completed successfully by checking for pending updates in `Dashboard > Updates` within the WordPress admin panel. Re-initiate any incomplete updates.

#### Preventing Recurrence

To avoid getting stuck in maintenance mode:

– **Backup Regularly**: Keep recent backups before updates.
– **Update Plugins and Themes Individually**: This minimizes conflict risks.
– **Check Server Requirements**: Ensure your host meets the necessary PHP and MySQL standards.

#### Using Plugins

Plugins like [WP Maintenance Mode](https://wordpress.org/plugins/wp-maintenance-mode/) can manage and enhance maintenance tasks, offering more control during maintenance without default reliance.

### Additional Troubleshooting Tips

– **Clear Your Cache** post-fix to view updated site changes.
– **Consult with Your Hosting Provider** if problems persist, as they may identify server-level issues affecting the update process.

By employing these steps, you can effectively manage WordPress maintenance mode, ensuring minimal disruptions and easier access restoration.

How to Increase the WordPress PHP Memory Limit

How to Increase the WordPress PHP Memory Limit

Introduction to PHP Memory Limit

WordPress runs on PHP, a scripting language that underlies its dynamic capabilities. The PHP memory limit determines the maximum memory a PHP script can utilize on a server. If set too low, running resource-heavy plugins or scripts can result in errors. Boosting this limit often improves performance and stability.

Step-by-Step Guide to Increasing PHP Memory Limit

Edit the wp-config.php File

One effective way to raise the PHP memory limit is to adjust the wp-config.php file, found in your WordPress root directory.

1. Access Your Site Files
– Utilize an FTP client like FileZilla or a hosting provider’s file manager.
– Go to the root directory of your WordPress setup.

2. Modify the wp-config.php File
– Open the wp-config.php file using a text editor.
– Add this line above the comment “That’s all, stop editing! Happy blogging.”:
define('WP_MEMORY_LIMIT', '256M');
This change sets the memory limit to 256MB, suitable for most sites.

Update the .htaccess File

Another approach is by editing the .htaccess file, also in your site’s root directory.

1. Locate and Open the .htaccess File
– Use an FTP client or hosting file manager to locate it in the root directory.
– Back up this file before making alterations.

2. Add the PHP Memory Limit Code
– Append the following line to the file’s end:
php_value memory_limit 256M

Use the php.ini File

For comprehensive control over PHP settings, editing or creating a php.ini file may be necessary.

1. Access the php.ini File
– If absent in your root directory, you may need to create it.
– Some hosts may restrict access or require it in a specific directory.

2. Modify the php.ini File
– Add or update this line:
memory_limit = 256M

Verify the Changes

After implementing changes, verifying the increased PHP memory limit is essential.

– Create a phpinfo.php file with the following content:
“`php

– Access this file by going to http://yourdomain.com/phpinfo.php in a browser.
– Verify the memory_limit reflects your adjustments.
– Delete this file after verification to secure server configuration details.

Conclusion

Enhancing the PHP memory limit can resolve performance issues related to extensive plugins and themes in WordPress. While effective, ensure necessary permissions and consult your host if changes are not applied. For more assistance, refer to the official WordPress documentation.

How to Create Custom Error Messages in WordPress

How to Create Custom Error Messages in WordPress

WordPress, a highly flexible platform, occasionally presents users with errors that can detract from the user experience. This guide explains how implementing custom error messages can both clarify any issues and provide guidance on resolving them, ultimately boosting user satisfaction and engagement on your site.

**Why Custom Error Messages Matter**
Custom error messages are crucial as they not only communicate what went wrong but also offer users steps to correct these issues. Such messages can significantly decrease user frustration and enhance the overall experience on your website.

**Creating Custom Error Messages**
1. **Functions.php Method**: Edit the `functions.php` file to customize error messages, such as login errors. For example, to change a login error message, use the code:
“`php
add_filter(‘login_errors’, ‘custom_login_error_message’);

function custom_login_error_message() {
return ‘Your custom error message here. Please try again!’;
}
“`

2. **Plugins**: Tools like WPForms provide a user-friendly interface to manage error messages without altering theme files, ideal for those less versed in PHP.

3. **Custom Page Templates**: Modify your theme’s `404.php` file to deliver a more cohesive visual experience:
“`php

Oops! Page not found.

It seems we can’t find what you’re looking for.


“`

**Testing and Conclusion**
After implementing, ensure your custom error messages function as intended by simulating various error scenarios. This enhances usability and professionalism on your site. Always back up files prior to changes and check WordPress’s developer resources for further learning.

How to Integrate a Payment Gateway in WordPress

How to Integrate a Payment Gateway in WordPress

Integrating a payment gateway into your WordPress site is pivotal for online monetization through seamless transactions. Selecting the right gateway involves considering transaction fees, supported currencies, and usability, with popular choices like PayPal, Stripe, and Skrill. Integration involves installing a suitable plugin, configuring it, setting up API credentials, and conducting tests before going live. Ensure all transactions are secure by implementing HTTPS and keeping all installations updated. This integration enhances site functionality and customer experience, with additional resources available for further guidance.

How to Fix a Corrupted WordPress .htaccess File

How to Fix a Corrupted WordPress .htaccess File

### Understanding the .htaccess File

The `.htaccess` file in WordPress is essential for managing redirects, URL rewrites, and other critical functions. A corrupted file can cause severe issues like the 500 Internal Server Error or 404 Page Not Found, impacting website accessibility and performance. Before addressing the `.htaccess` file, ensure the problem isn’t due to plugins or themes.

#### Identifying a Corrupted .htaccess File

Signs of corruption include server errors and broken site functionalities. Troubleshoot by confirming the issue isn’t from external elements like plugins or themes.

#### Backup Your .htaccess File

Always back up your existing `.htaccess` file before making modifications. This allows for easy restoration if issues arise. Use an FTP client or your hosting provider’s file manager to download the file.

### Steps to Fix a Corrupted .htaccess File

1. **Locate Your .htaccess File**: Find the file in your WordPress root directory using an FTP client like FileZilla or your host’s file manager.

2. **Delete or Rename the Existing .htaccess File**: Renaming is safer as it allows for file restoration if necessary. Deletion might be unavoidable if renaming fails.

3. **Create a New .htaccess File**: If the old file is removed, create a new one using a text editor by pasting the default WordPress content. Save and upload it to your WordPress root directory.

4. **Test Your Website**: After uploading the new file, check your website to ensure the problem is resolved. Persistent issues might indicate other problems, such as incompatible plugins or themes.

5. **Reset Permalinks**: Regenerate the `.htaccess` file with proper rules by navigating to Settings > Permalinks in your WordPress dashboard and clicking Save Changes.

### Conclusion

Dealing with a corrupted `.htaccess` file requires careful action to avoid further complications. With these steps, you can effectively restore your website’s functionality. Always remember to backup files and stay informed about managing `.htaccess` files for optimal WordPress site management.

How to Add CAPTCHA to WordPress Login and Comment Forms

How to Add CAPTCHA to WordPress Login and Comment Forms

CAPTCHA is a valuable tool for enhancing website security, particularly for WordPress sites. By adding CAPTCHA to login and comment forms, you can effectively block spam bots and protect your site from brute-force attacks, ensuring only genuine users can interact with your content. There are two main methods to implement CAPTCHA on WordPress: using a plugin or manual integration.

Using a plugin is a straightforward option suitable for most users. Popular plugins like Google’s reCAPTCHA, WPForms, and Wordfence Security offer easy integration by following simple steps in the WordPress dashboard. This approach requires minimal technical skills and is quick to set up.

For those with coding experience, manually adding CAPTCHA allows for greater customization. This involves obtaining API keys from a CAPTCHA service and modifying theme files—such as `functions.php`—to incorporate and validate the CAPTCHA in login and comment forms. However, this method carries risks and is recommended only for advanced users.

Regardless of the method chosen, implementing CAPTCHA is a crucial step in safeguarding your WordPress site from spam and unauthorized access, contributing to its overall security and integrity.

How to Change the Default WordPress Login URL

How to Change the Default WordPress Login URL

WordPress uses the default login URLs `/wp-login.php` or `/wp-admin`, which can be vulnerable to brute force attacks. Changing the login URL enhances security, reduces spam from bots, and allows customization of the login experience. The simplest way to change the URL is by using plugins like WPS Hide Login, Loginizer, or All In One WP Security & Firewall. These plugins offer security features that are easy to implement. Alternatively, you can manually edit the .htaccess file to redirect the login URL, but take precautions such as maintaining backups. Changing the login URL is a step towards securing your WordPress site.